
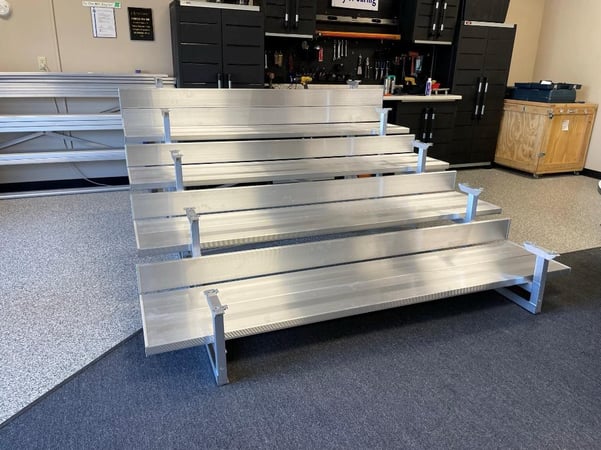
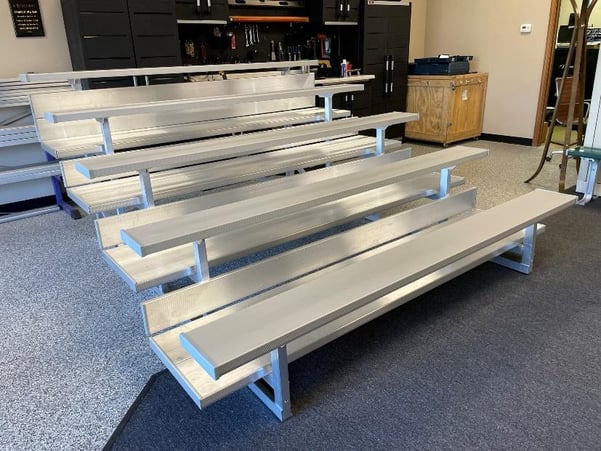
How to Assemble Bleachers
If you’ve invested in new aluminum bleachers from NRS, it’s crucial that you know how to set them up properly. Our guide is designed to provide you with assembly tips that you can use alongside your instruction manual for your specific bleacher system. It is important to note that aluminum bleachers come in many different sizes and styles, so be sure to take that into consideration as you prepare to install your new seating.
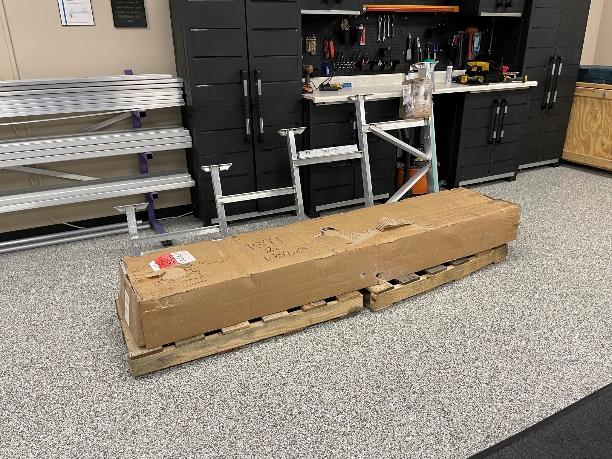
After receiving your order, please make sure to inspect for visible damage. If there is damage, you will want to note the damage on the bill of lading from the freight company. Also, please take photos of the damage. This is important for us to work with the freight company for damage claims. For further information in regards to receiving your materials, please refer to the “day of delivery” information.

Unpacking Your Bleachers
Once all the materials are moved into their staging area, you will want to get the materials unpacked to inspect for possible damage and to separate the materials. It is best to notify us within 5 business days from date of delivery for claims of hidden damages.
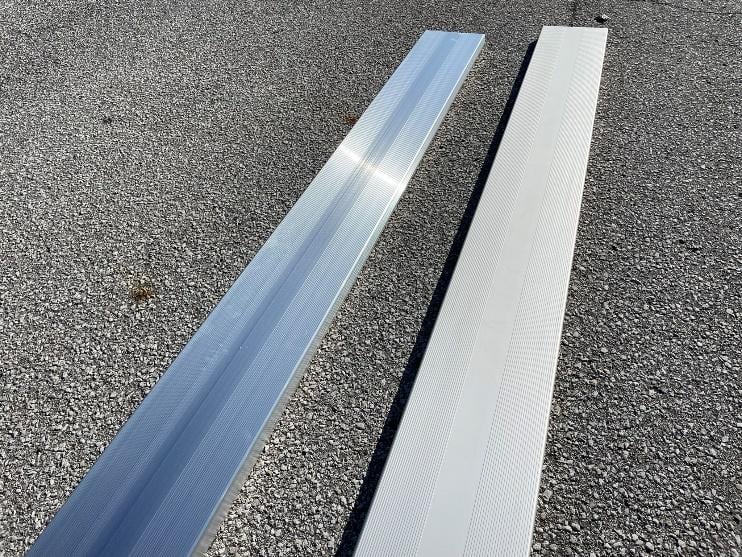
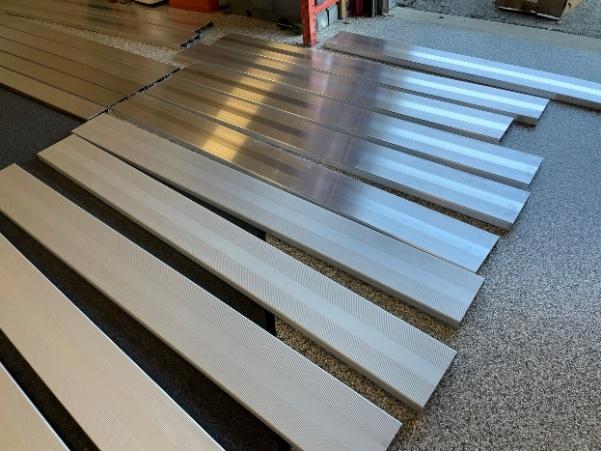
It is recommended that all of the planks are laid out individually after unpacking them, and not stacked on top of each other. If moisture is collected or trapped between planks while they are touching, it creates a reaction that can cause staining. The staining does not weaken the plank, but it can cause discoloration of the surface.
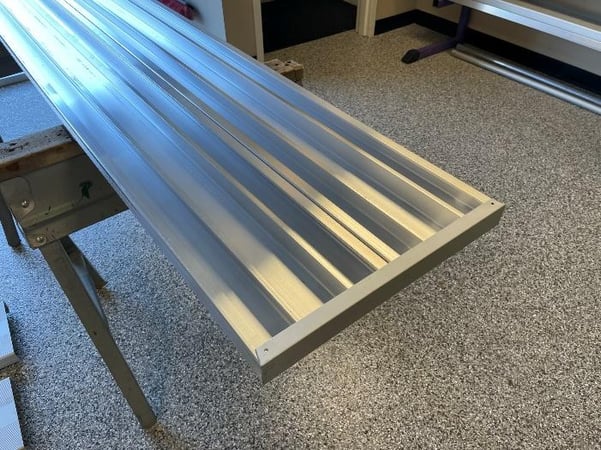
To make it easier when you begin installation/assembly you will want to separate your seat planks from the foot planks. The foot planks will have a mill finish, which is shiny in appearance. The seat planks will have a clear anodized finish, which gives a dull appearance to the plank.
Steps to Installing Your Bleachers
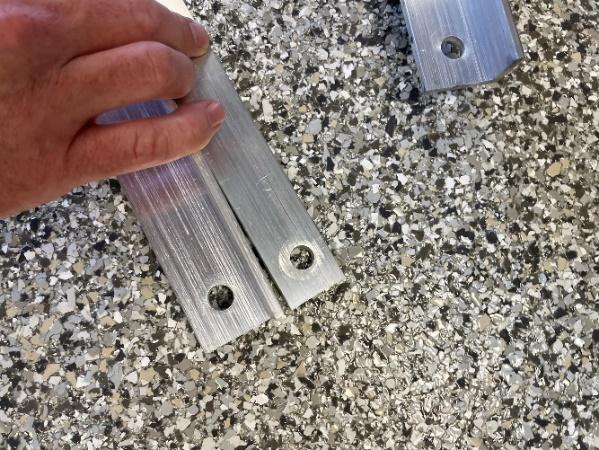
- Attach Planks to End Caps: Using sawhorses, place the plank upside down to attach the end caps. Please refer to the provided assembly drawings for the specific configurations for your model. The drawings should be in a box with a label that says, “drawings enclosed.”
- Align End Caps: The end caps are then placed over the end of the plank, with the screw holes facing up. You may use a rubber mallet to gently tap the end caps on if needed. You will want to make sure to line up the edge of the end cap with the edge of the plank.
- Secure End Caps: Using the small self-tapping screws provided and a cordless impact drill, secure the end caps to the plank. Repeat this process for all the plank for your order.
- Assemble Cross Bracing: Next you should pre-assemble the cross bracing. Each pair of cross bracing will be made of a flat bar and an angle. These parts will have three holes that should line up. You may have different sizes of bracing depending on the model you have purchased. Please refer to the assembly drawings for specific configurations.
- Secure Cross Bracing: Insert a 3/8” Hex Head Bolt (B38114) thru center hole. You will want to have the flat bar behind the angle. Put a 3/8” Flange Nut (FN38) on the bolt, do not tighten fully. Repeat this process for all your cross bracing. You will end up with finished pairs, like a flexible “X”.
- Attach Bracing to Seating Frames: Attach your bracing to one of the seating frames. The bracing will be attached to the frame using a 3/8” Hex Head Bolt (B381140 and a 3/8” Flange Nut (FN38), do not fully tighten. Refer to the provided assembly drawings for the configuration of your model.
- Connect Bracing: Next you will want to connect the previous set of bracing to the next seating frame. This is done the same way as the previous step.
- Set Up Frames: Once you have the bracing connected to the next frame, the distance between frames should match what is in your assembly drawings.
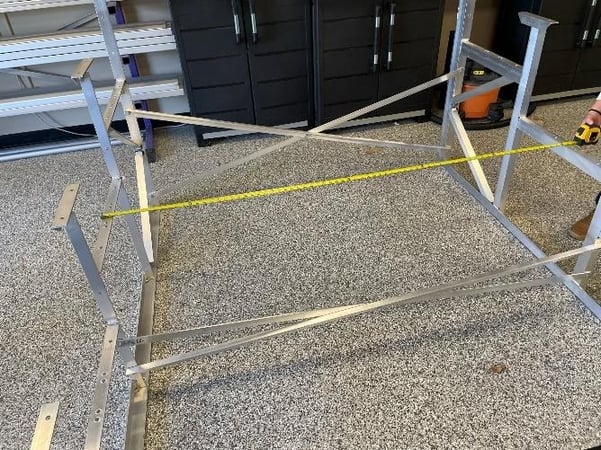
- Tighten Bracing: Once all the bracing is connected, tighten all the nuts and bolts that have been installed up to this point. Your seating frame should remain square.
- Set Up Bays: Depending on the length of your bleachers, you may have bays (spaces between frames) that have x-bracing and others that have spacer braces. The spacer braces help in creating the correct space between frames. Bays with x-bracing are commonly referred to as closed bays, and the bays with spacer braces are referred to as open bays.
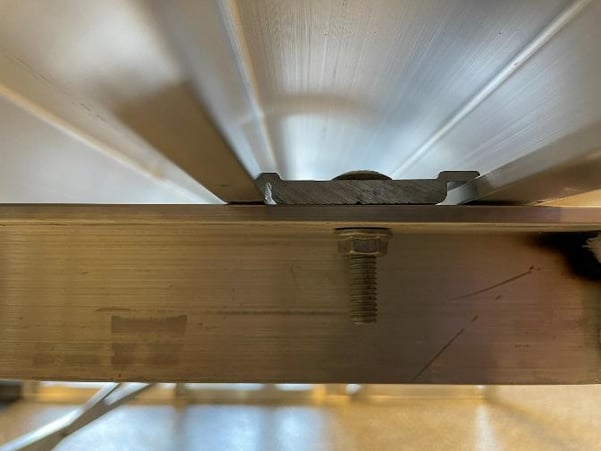
- Pre-Set Plank Tie Down Clips: After getting all the framing connections tightened, you will want to pre-set all the plank tie down clips (CL-UNIV). The clips are attached to the seating frames using 5/16 Carriage Bolt (C56112) and 5/16 Hex Nut (HN516). Place the clips 90 degrees from the frame. Refer to provided assembly drawings for configuration of your model.

- Place Foot Planks: Once you have all the clips placed in their locations in the seating frames, it is now time to place your foot planks. If you have double foot boards, it is easier to install with tilting the foot planks.
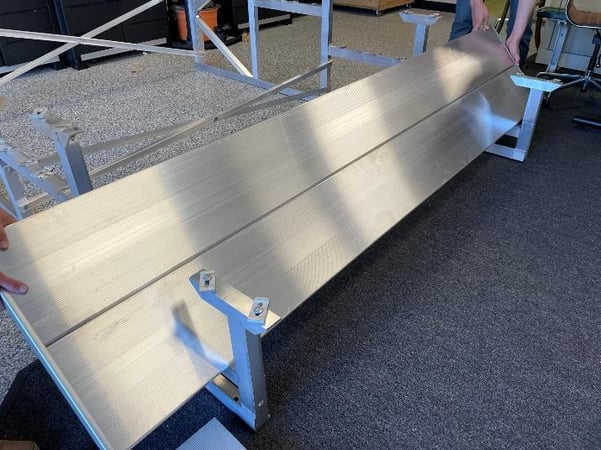
- Align Foot Boards: For a standard 24” run (double 2x10 plank foot board) the edge of the rear most plank should be 1 ½” from the front of the vertical angle for the seat. The overhang is measured from the center of the foot support angle. These dimensions do vary by model, so please refer to the installation/assembly drawings.
- Secure Foot Boards: To secure the foot boards in place, you will need to rotate the clips in place and tighten.
- Attach Riser Planks: If your bleachers have risers, you will attach them in the same manner as the foot boards. Make sure to align the top edge of the riser plank to top of the foot board support angle. The riser mounts to the vertical angles under the seat supports on the seating frame. The edge of the riser plank will align with the foot boards.
- Attach Seat Planks: After you’re done with the risers, you will attach the seat planks. The seat planks are attached to the seat support angles using the plank tie down clips as in previous steps. Check to make sure the plank is supported on both sides. The best way to determine if the plank is properly located on the support angle is to feel under the edges of the plank where it meets the angle. There should be an equally spaced distance from the edge of the angle to the edge of the plank.
At NRS, we are committed to creating quality products to meet customer contract requirements in a timely manner. As a demonstration of our commitment, NRS will strive to provide customers with high-quality installations and customer service which exceeds expectations and promote customer satisfaction. Contact us today to learn more about our aluminum bleachers. Thank you for your purchase and allowing us to help you fulfill your seating needs.